A few years ago, I bought a really cute patio furniture set which was composed of a small metal table and two matching metal chairs. I put them on the front porch under the arbor. They were great for sitting and drinking a cup of tea and watching the hummingbirds feed at the cross vine.
When I moved into my new house, I put them on the lawn in the backyard. Unfortunately my backyard is a haven for mosquitoes, so for the year that I’ve lived here, I have not sat at my table but once. And that only lasted for about 15 minutes until I couldn’t take it anymore.
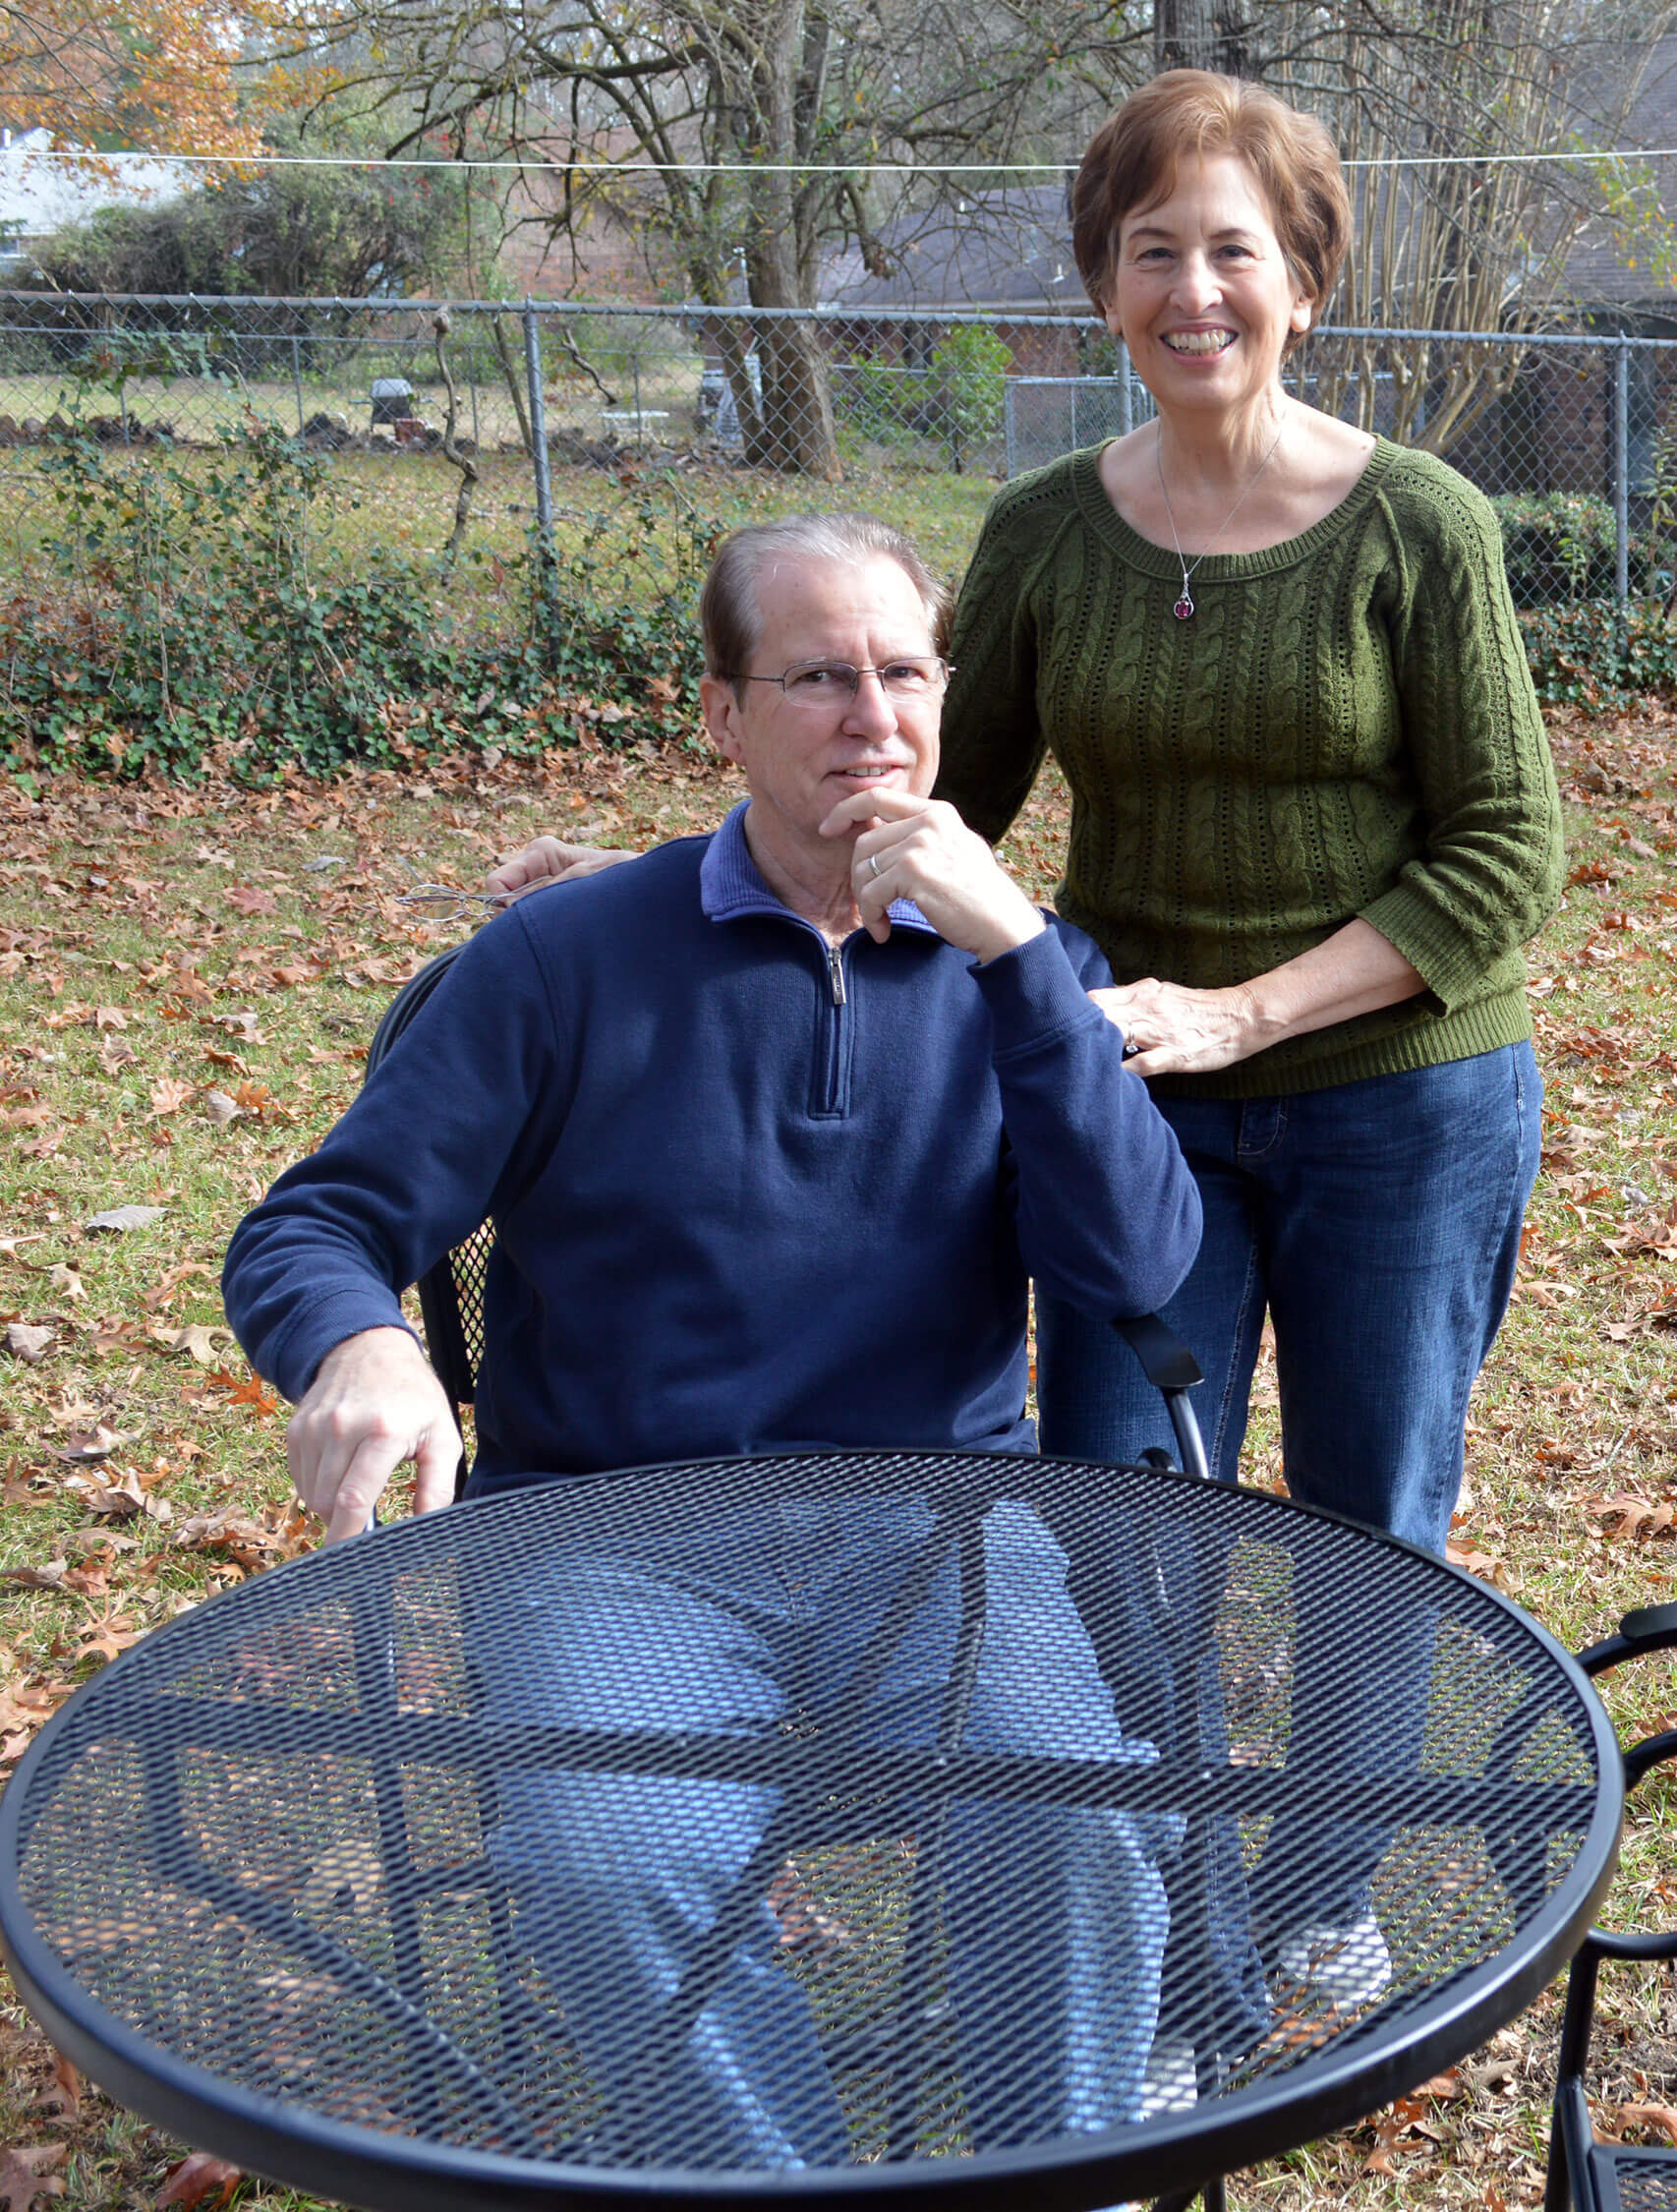
Rather than have the table and chairs sit unused in my backyard, I decided to give them to my parents. They love to sit outside in nice weather. I knew they would appreciate them.
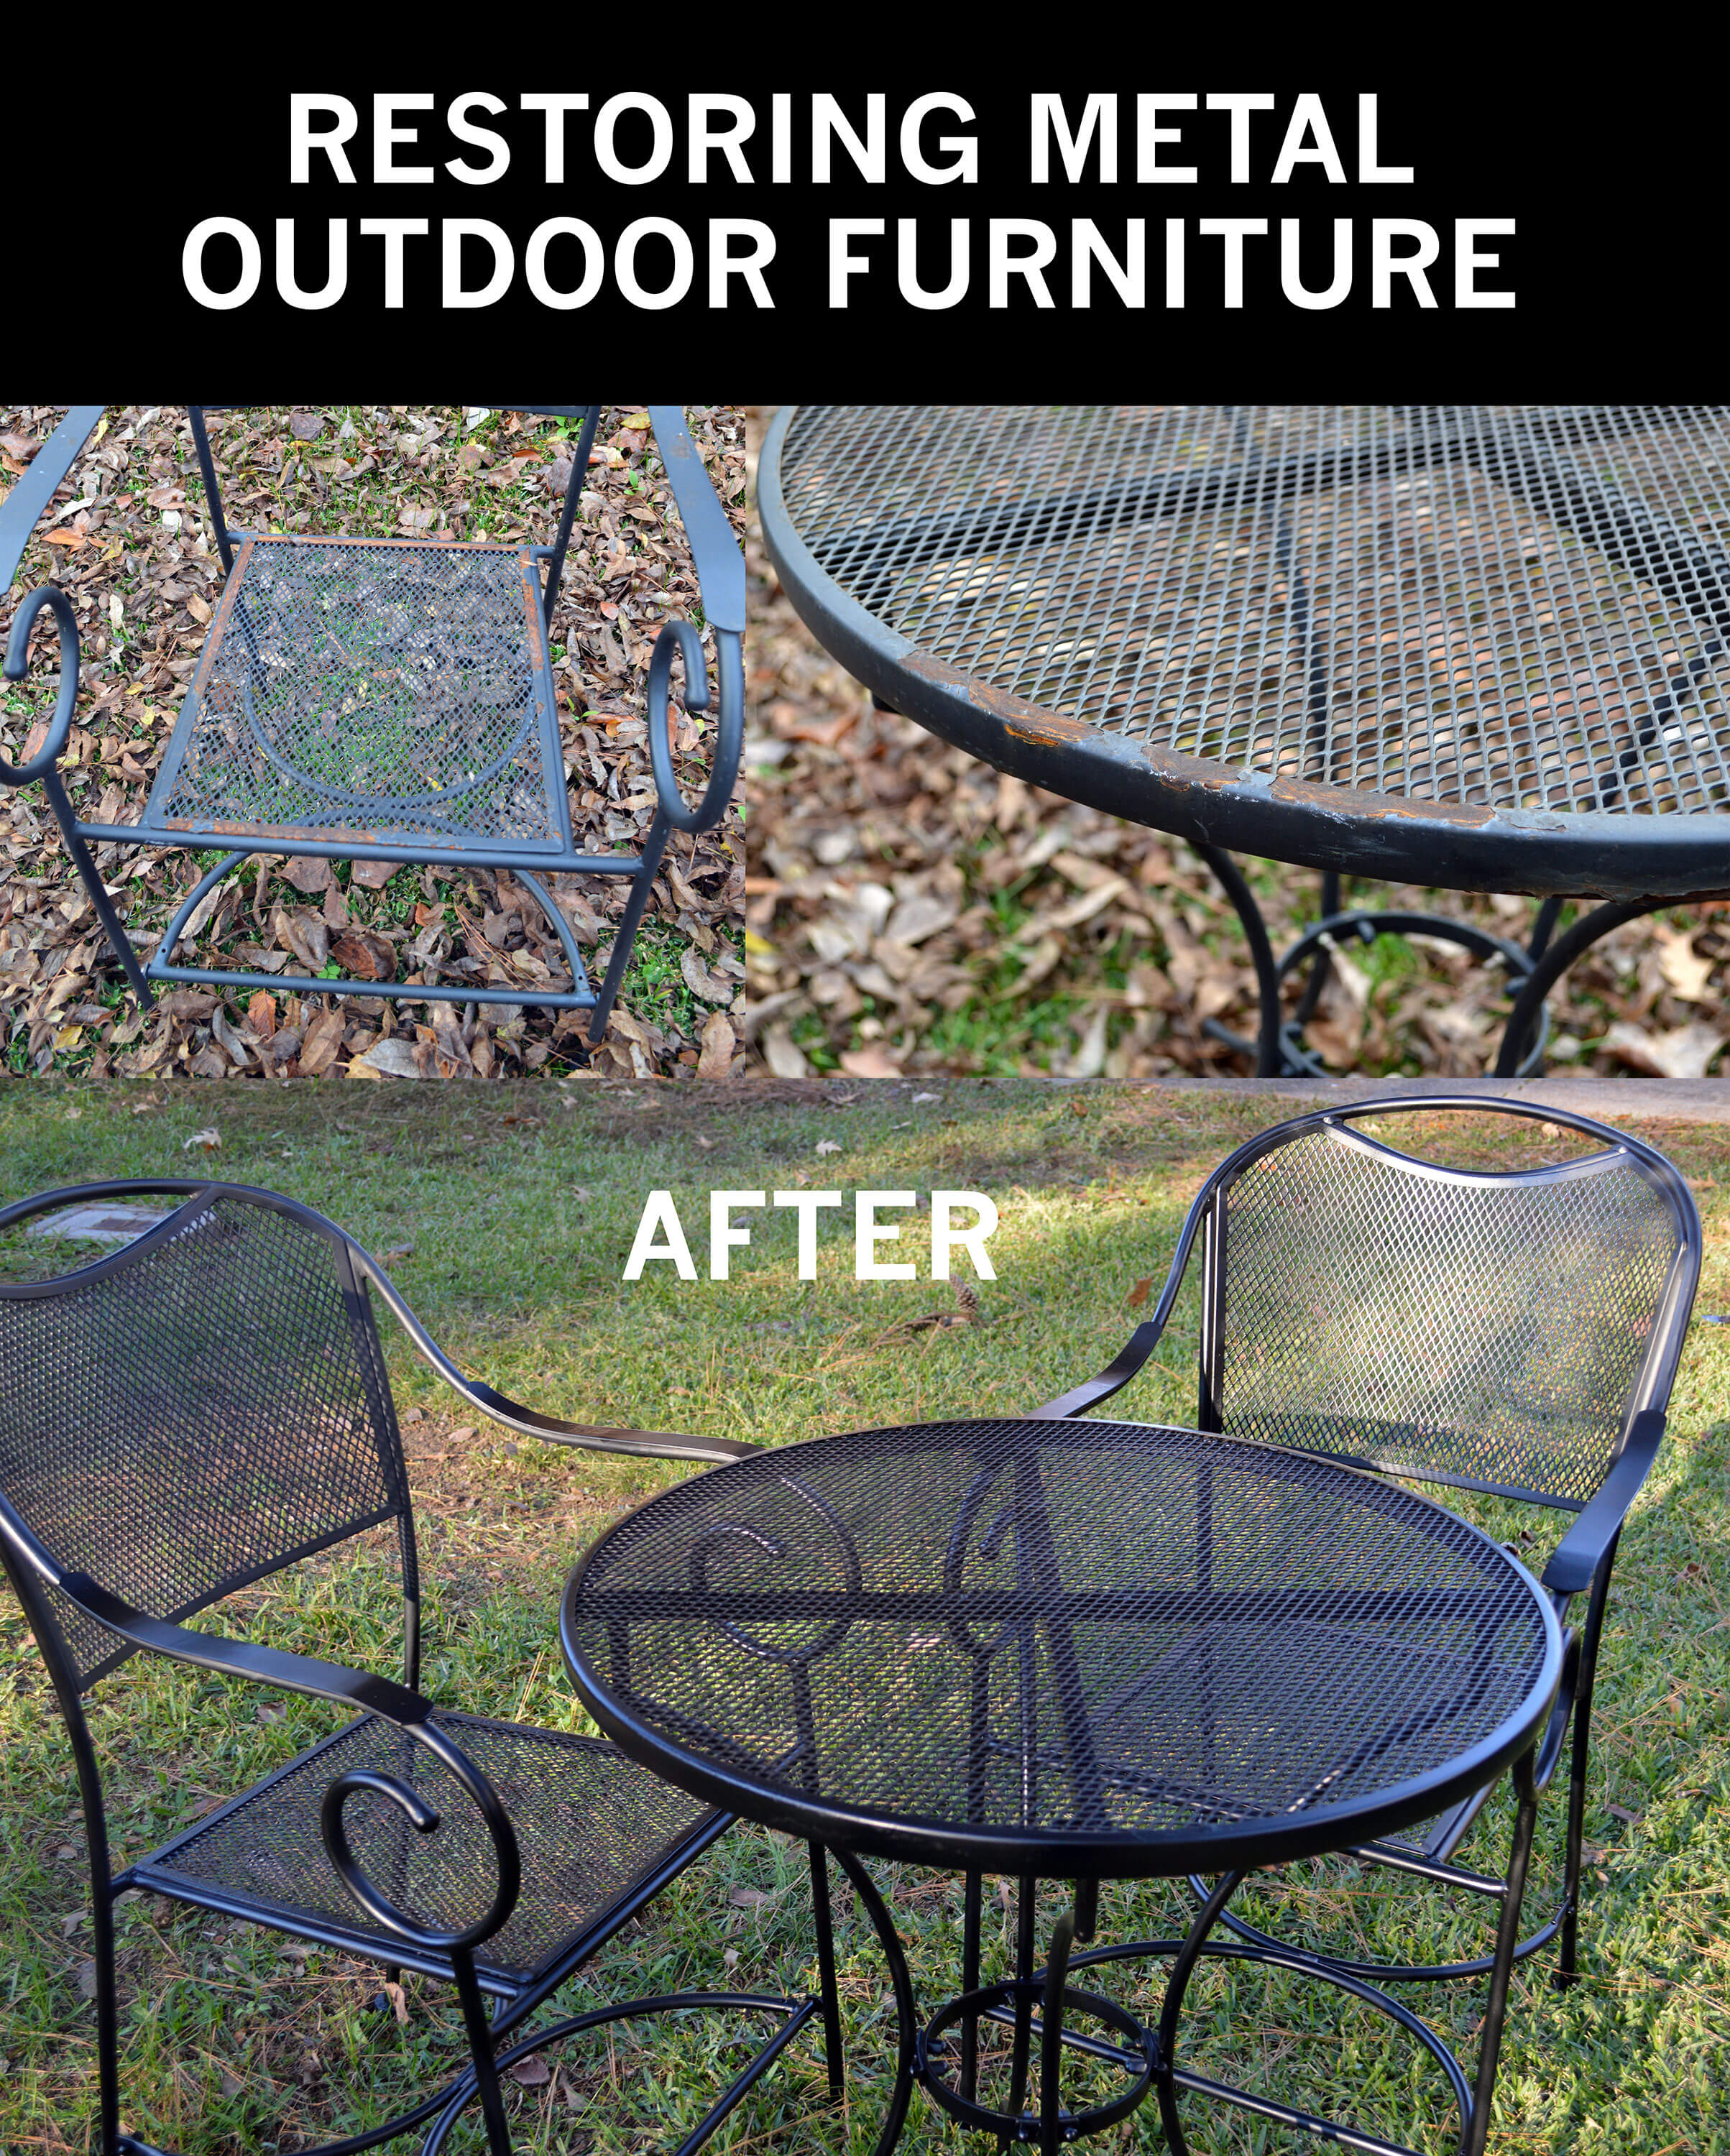
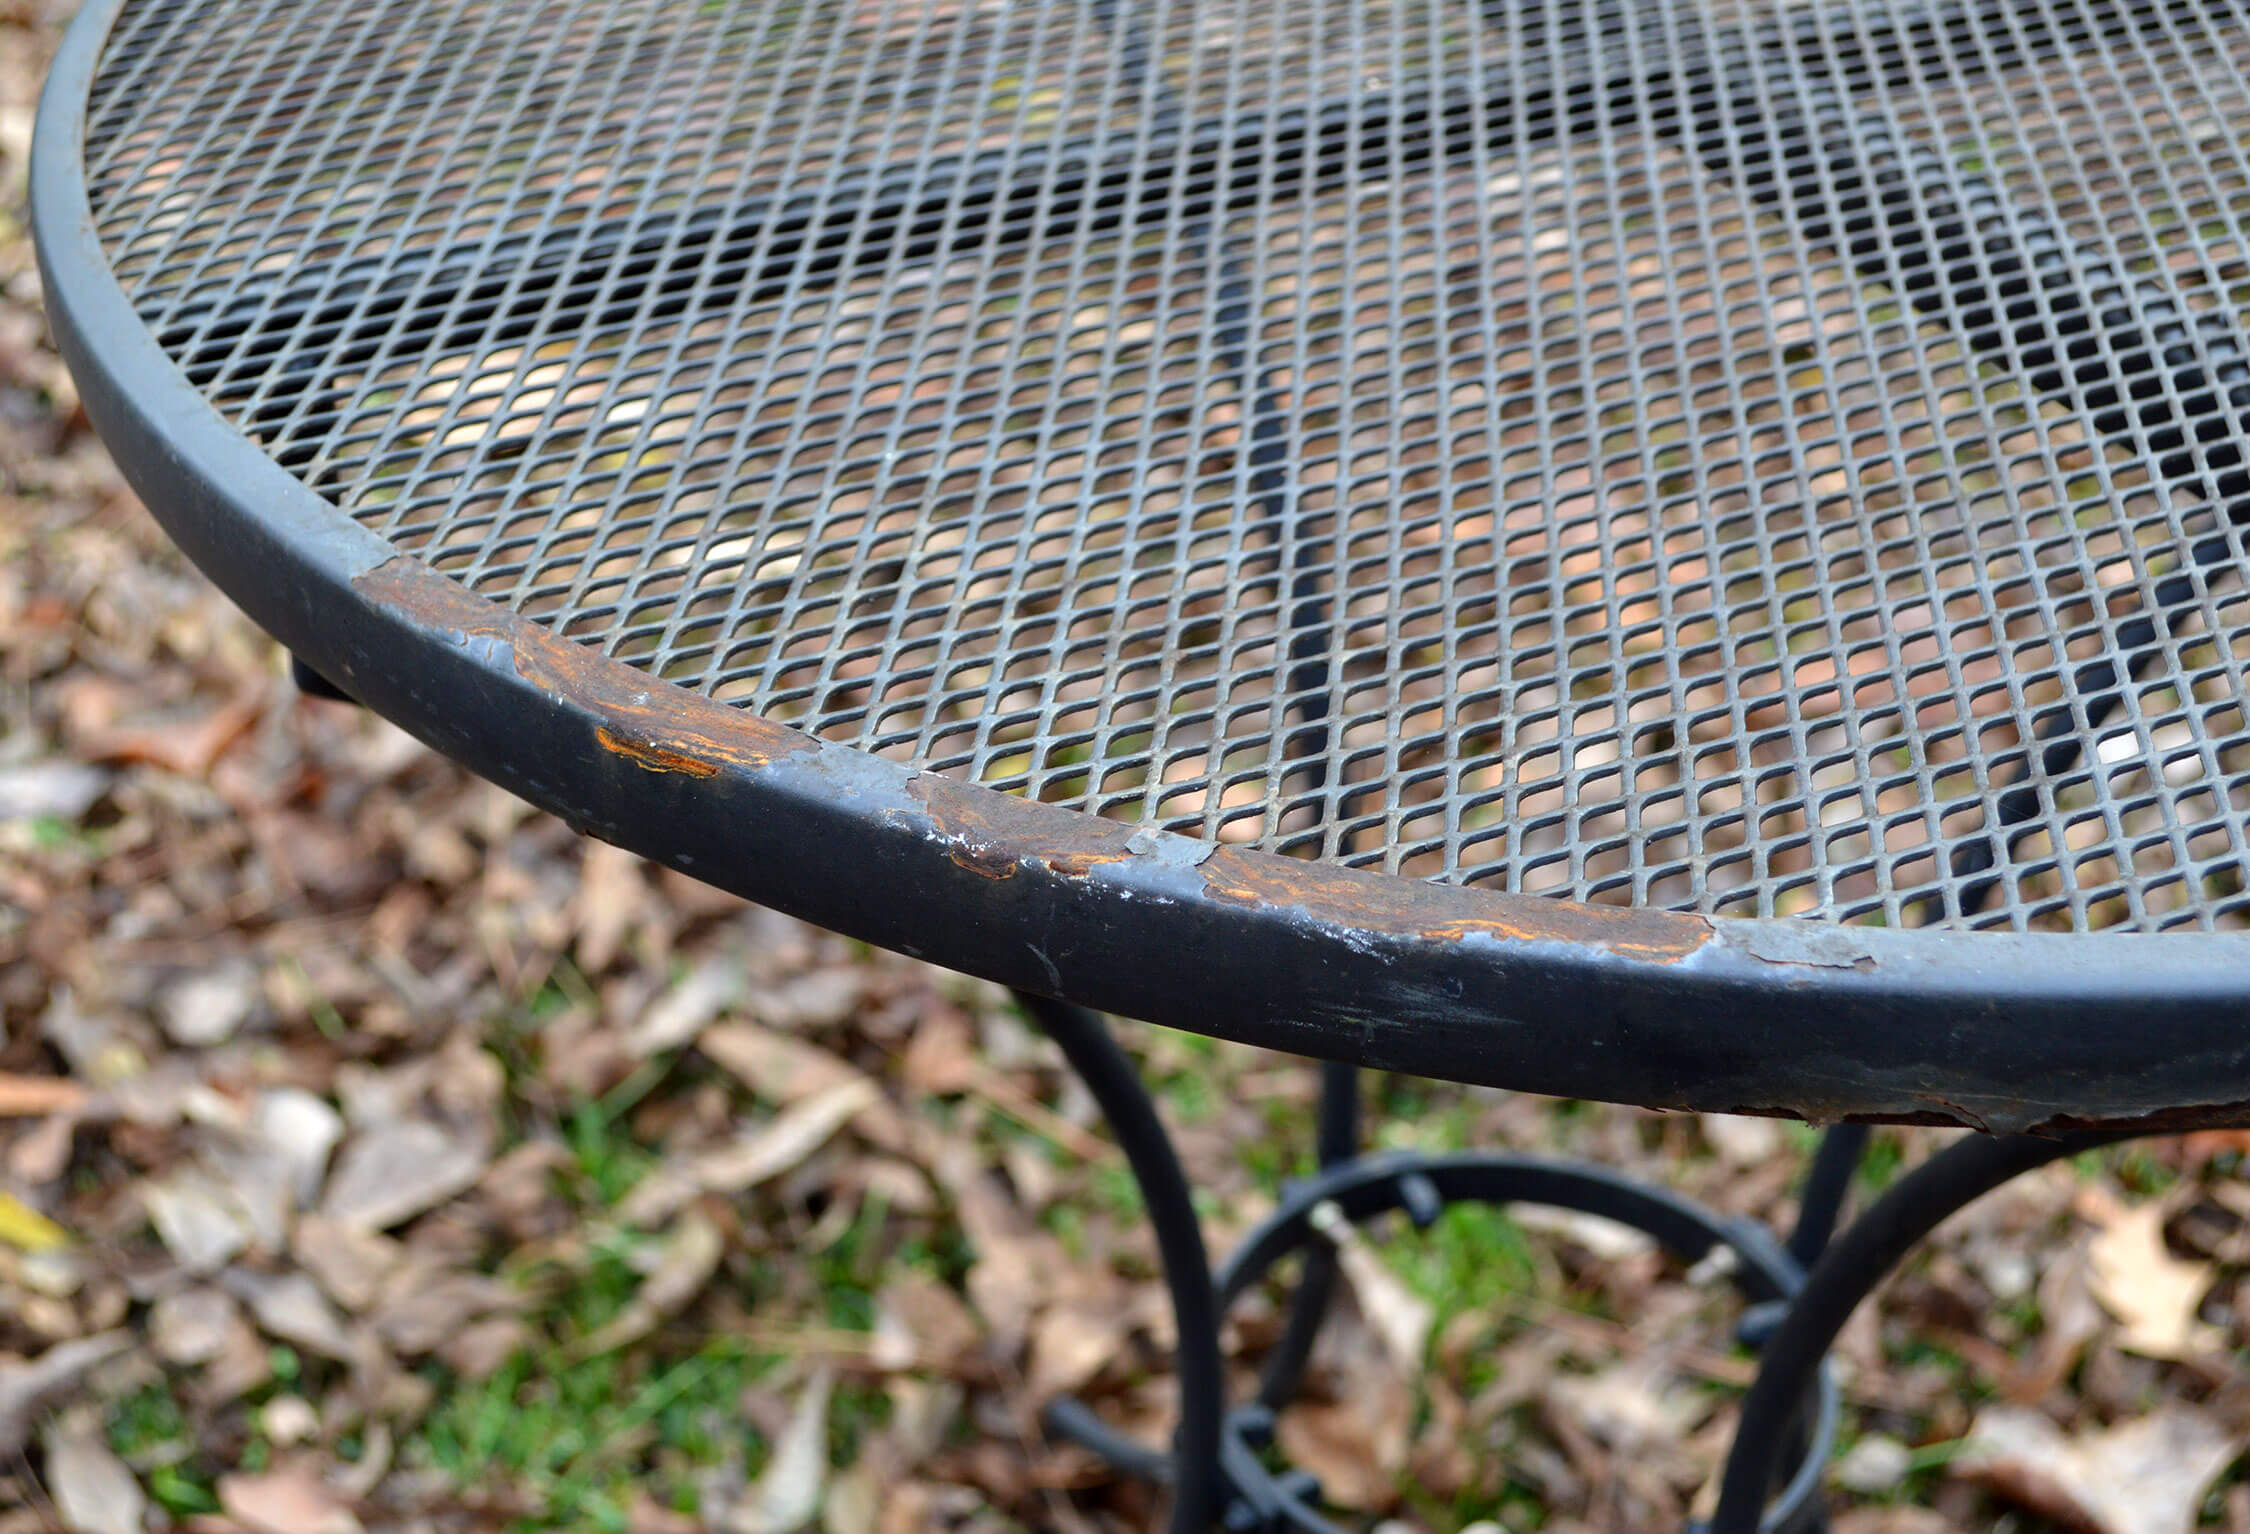
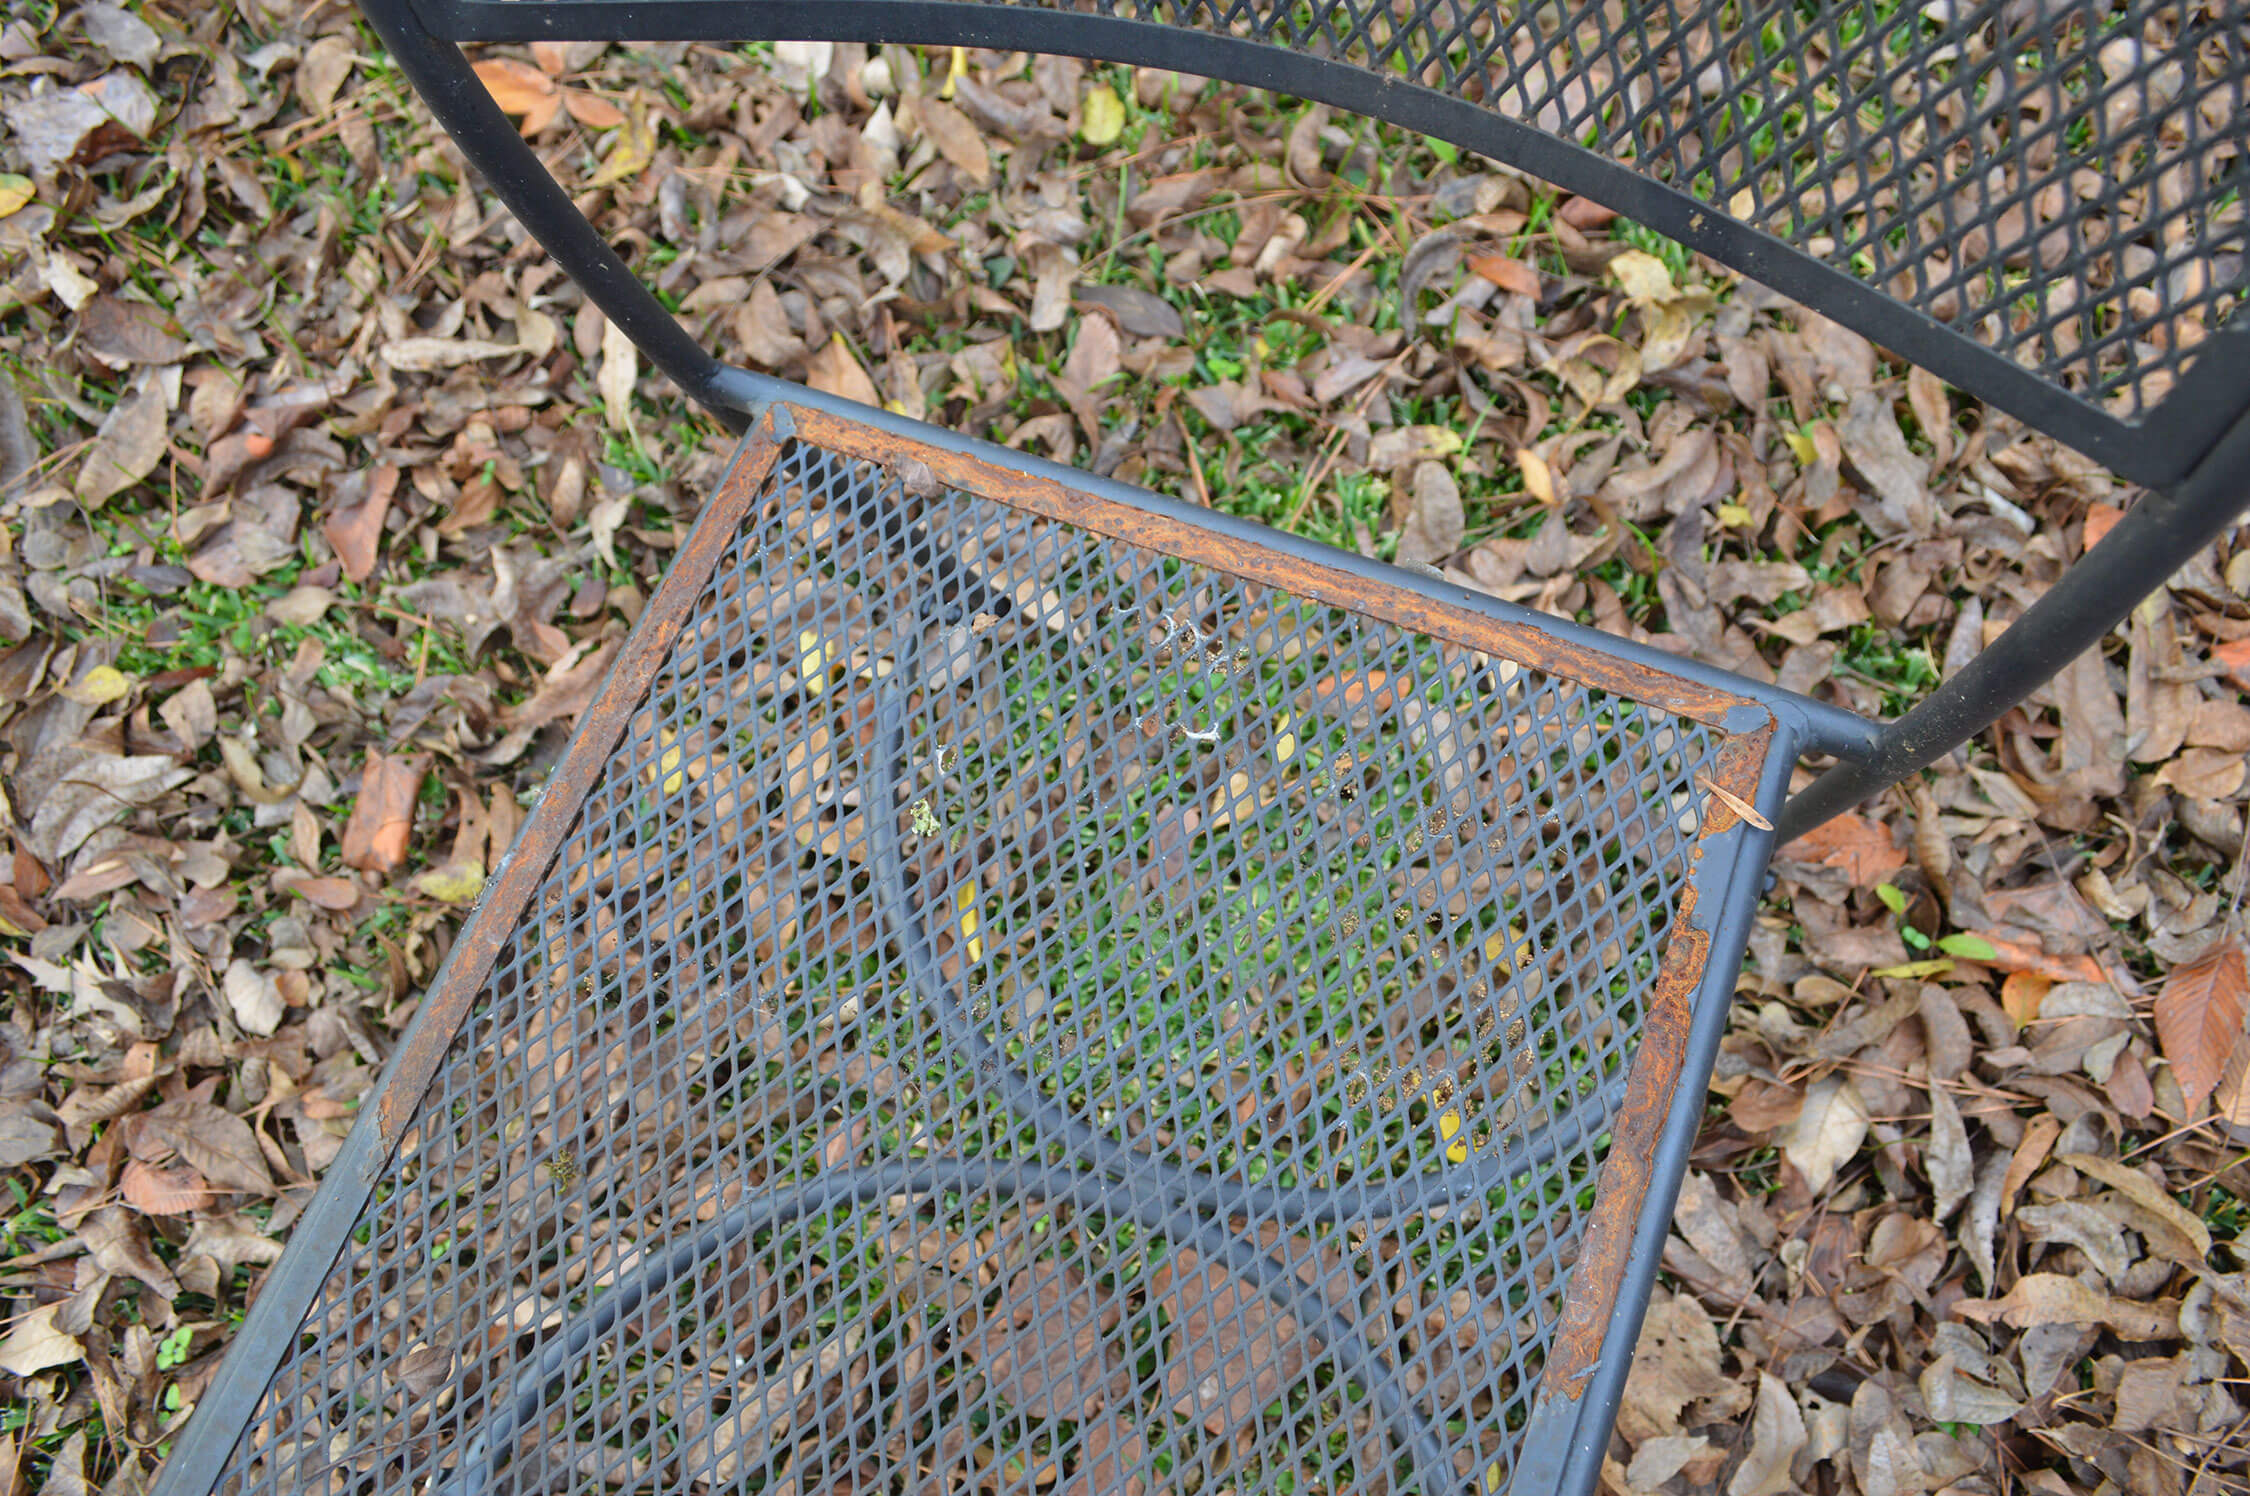
Unfortunately, the years had not been kind to the furniture and I noticed several places where the paint was peeling off and rust had formed. I didn’t want to give my parents something that looked like it was falling apart, so I decided to fix them up!
Step 1: Removing flaking paint and rust
My dad taught me everything I know about fixing things. I’ve helped to re-shingle a couple of roofs, painted more rooms than I care to remember, done a tiny bit of electrical work, and worked on a few other odds and ends. I’m not the best handywoman in the world, but I can hold my own.
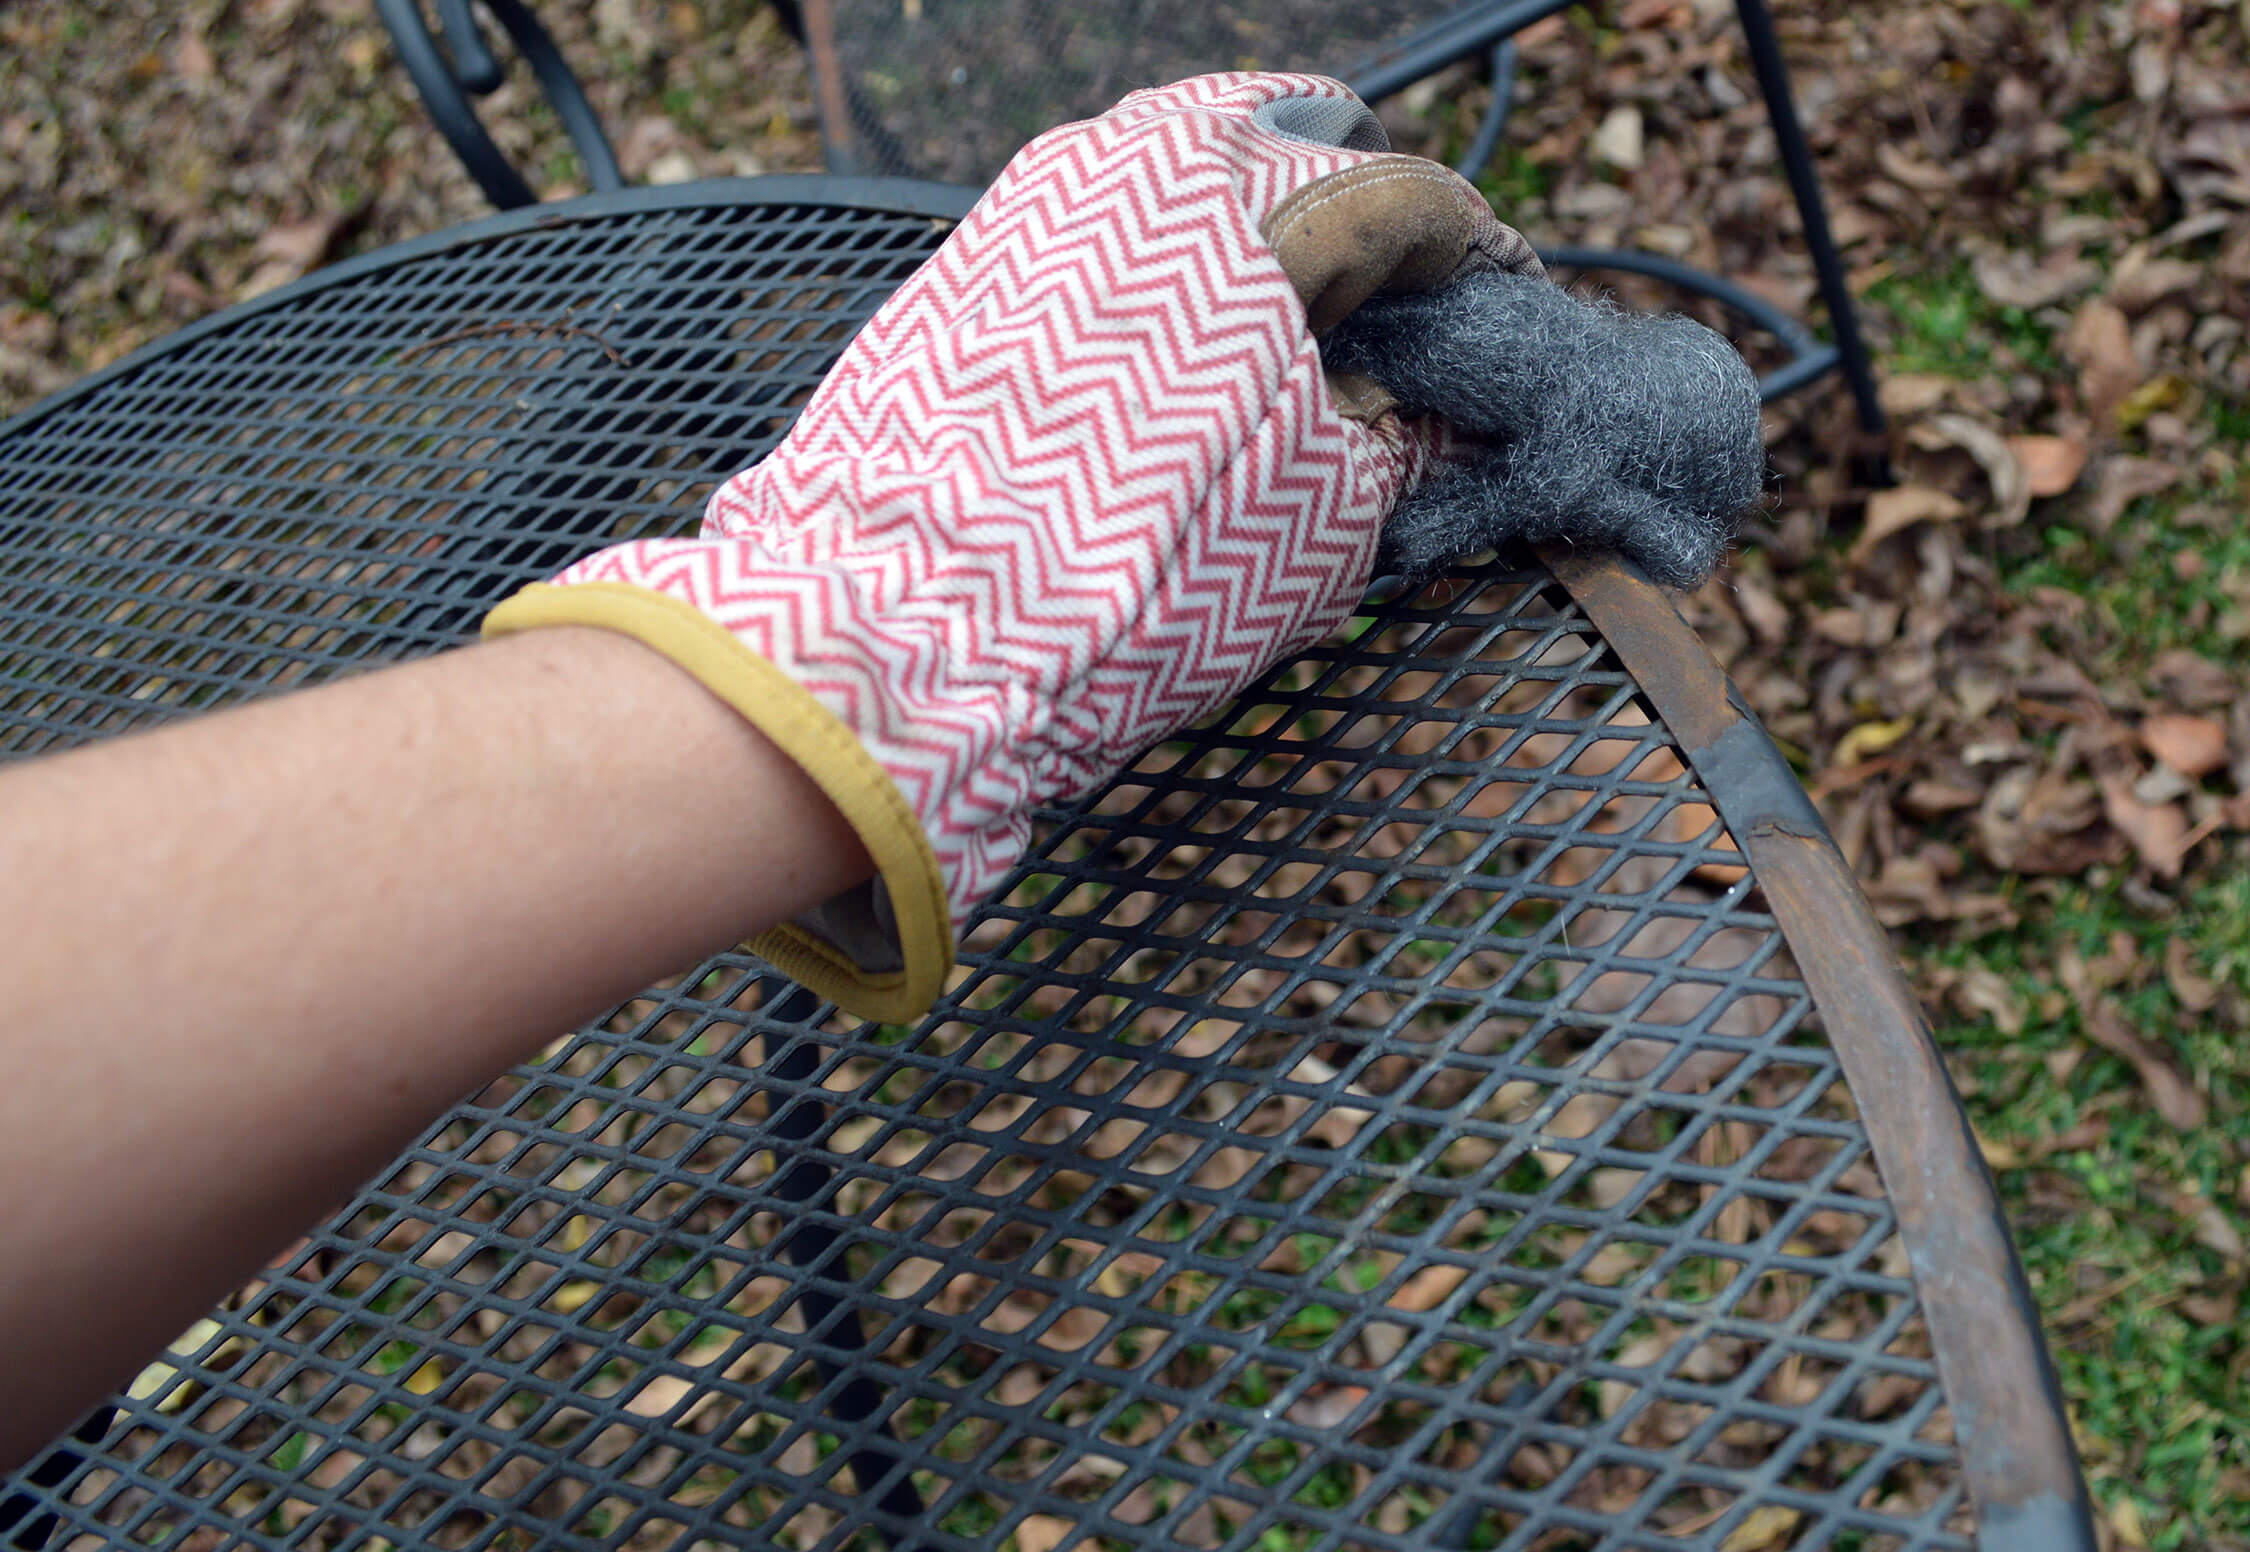
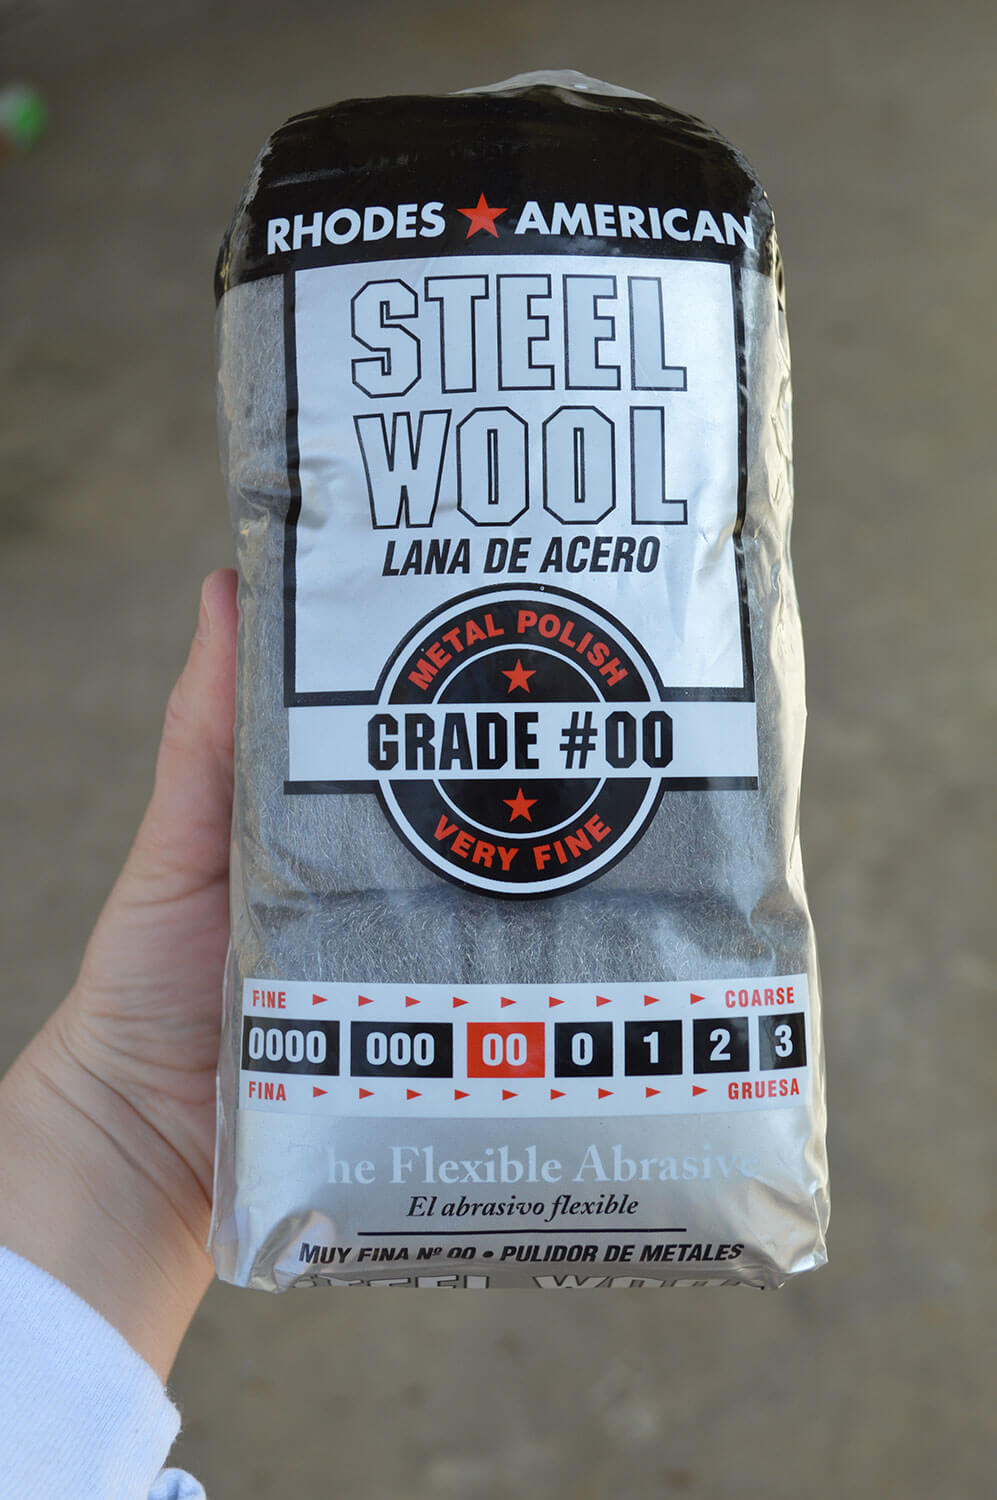 So, when I saw the flaking paint and rust on my outdoor furniture set, I knew that it would have to be scraped off and sanded prior to repainting. I used a paint scraper to remove any paint flakes and then used a fine grade steel wool to sand it down. Mine were grade #00 (very fine). You could go with a coarser grade and I’m sure it would be fine.
Step 2: Wash away any dirt
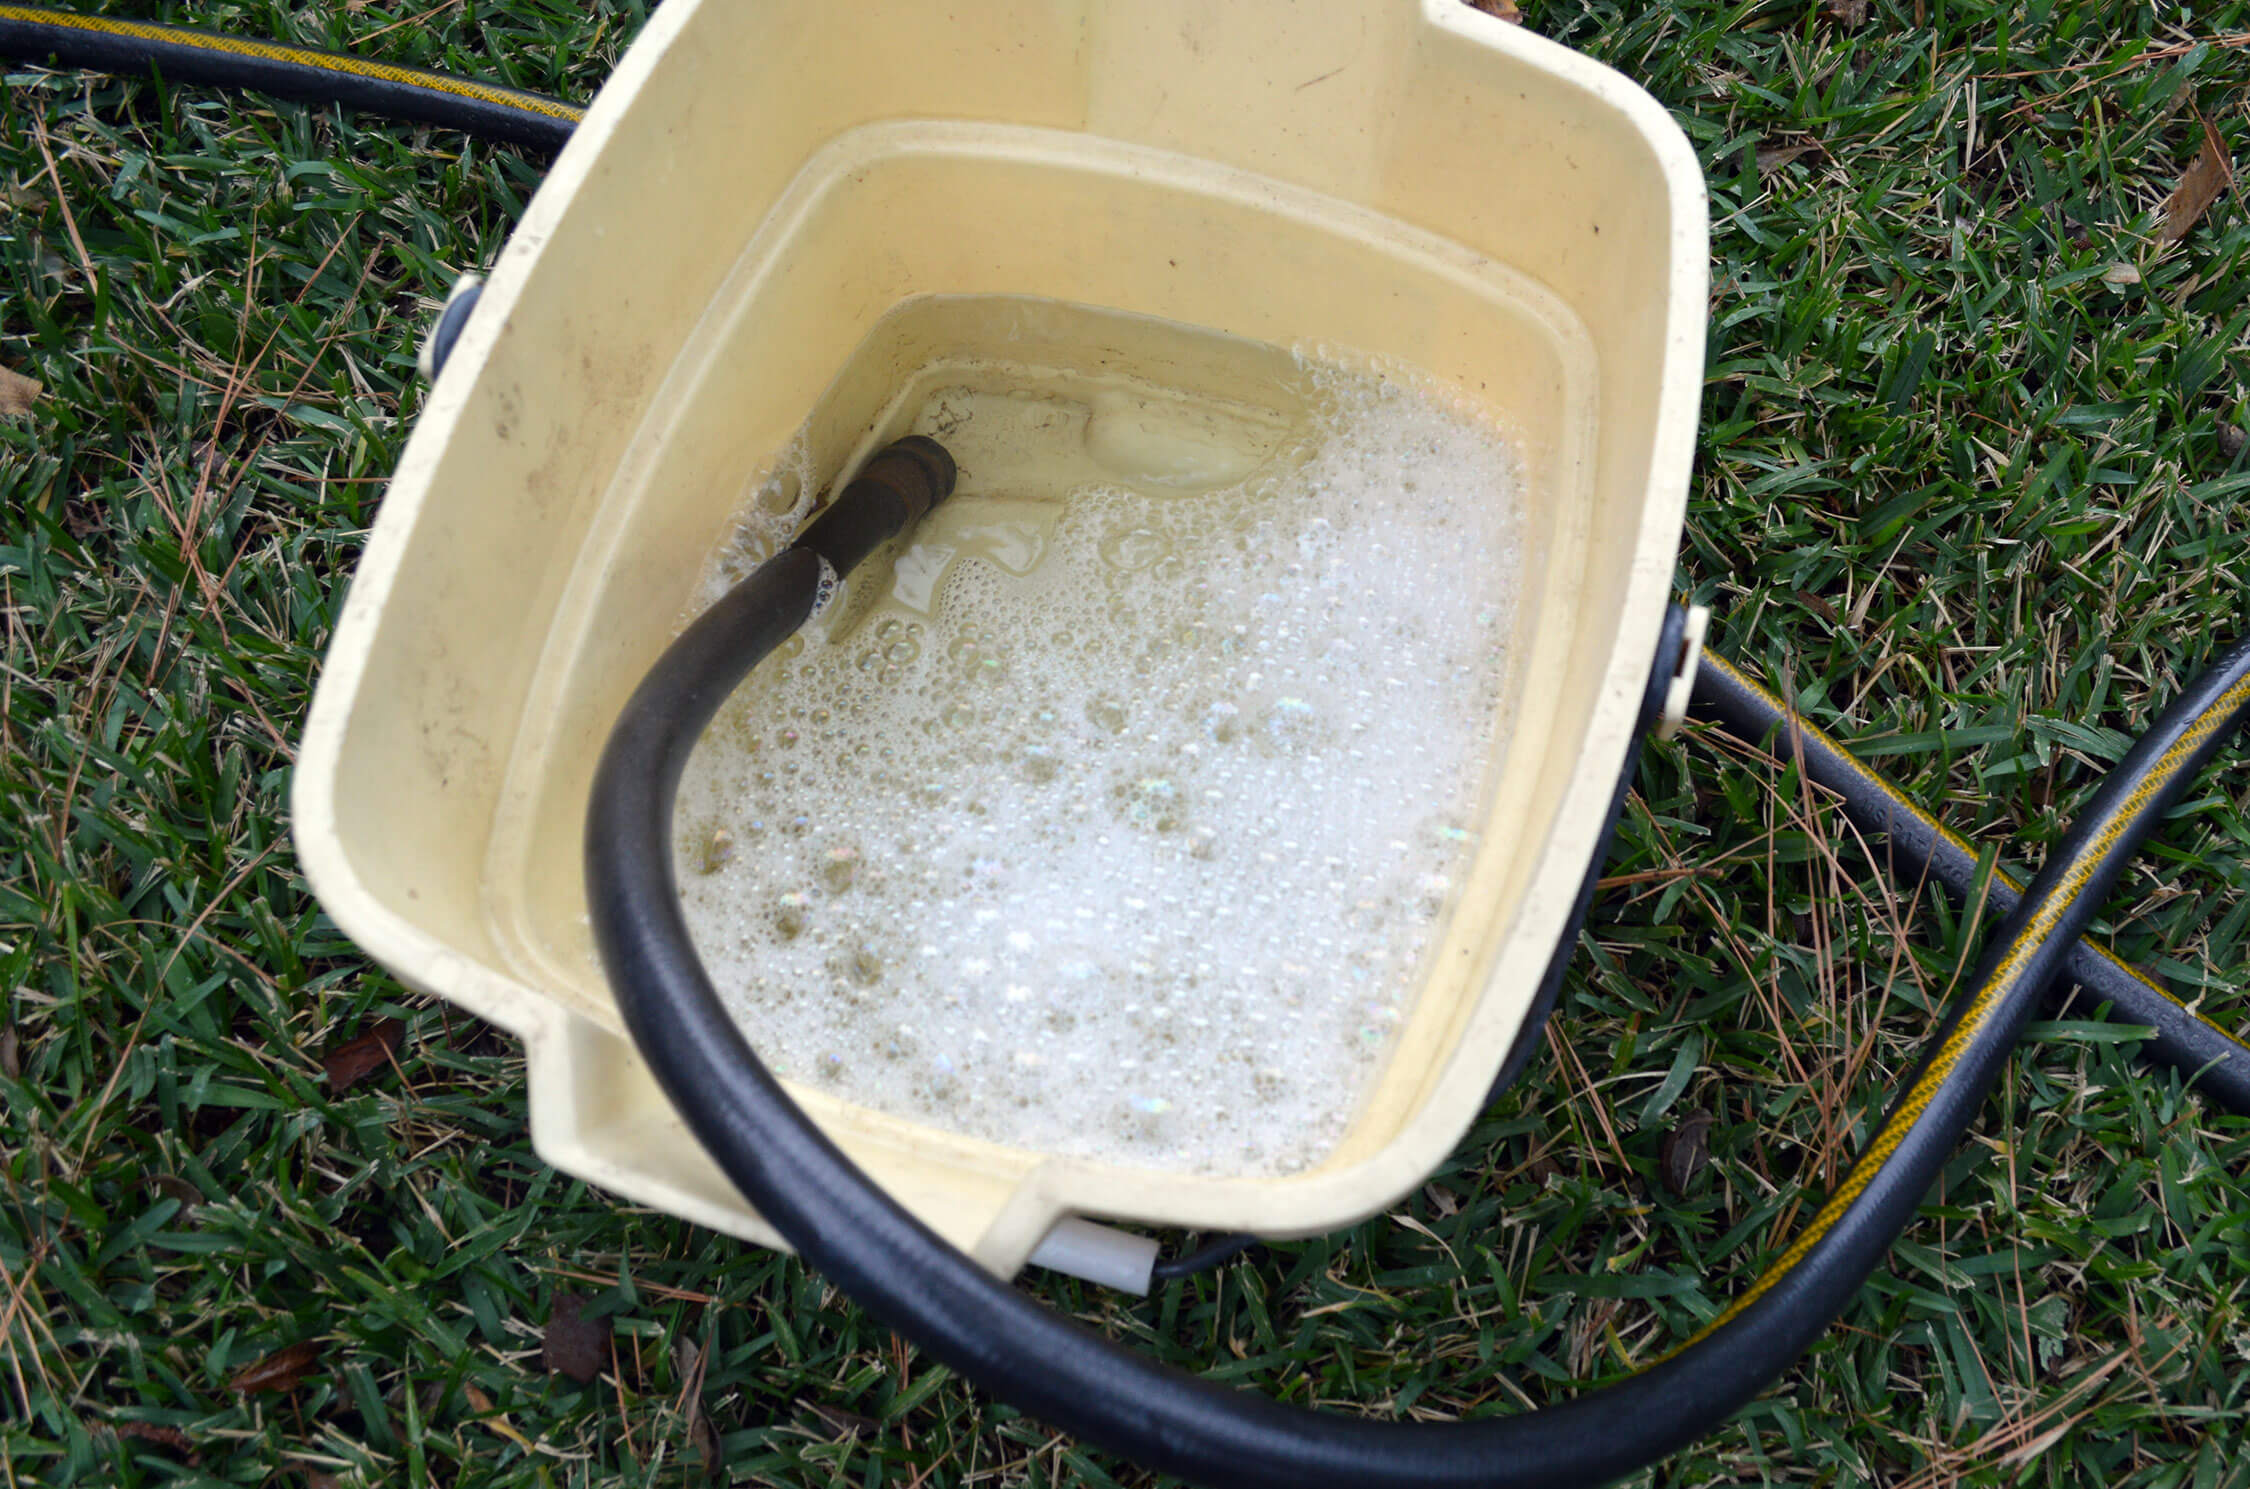
After sanding off the rust and paint flakes, I wanted to make sure the chairs and table were clean prior to painting them. If you leave dirt on something that you wish to paint, it is more likely that your paint will flake off as a result.
I used dishwashing detergent and a rag to wash down the chairs and table and then sprayed them off with a hose. Be sure to let them dry completely before attempting to paint.
Step 3: Cover everything that you don’t want painted
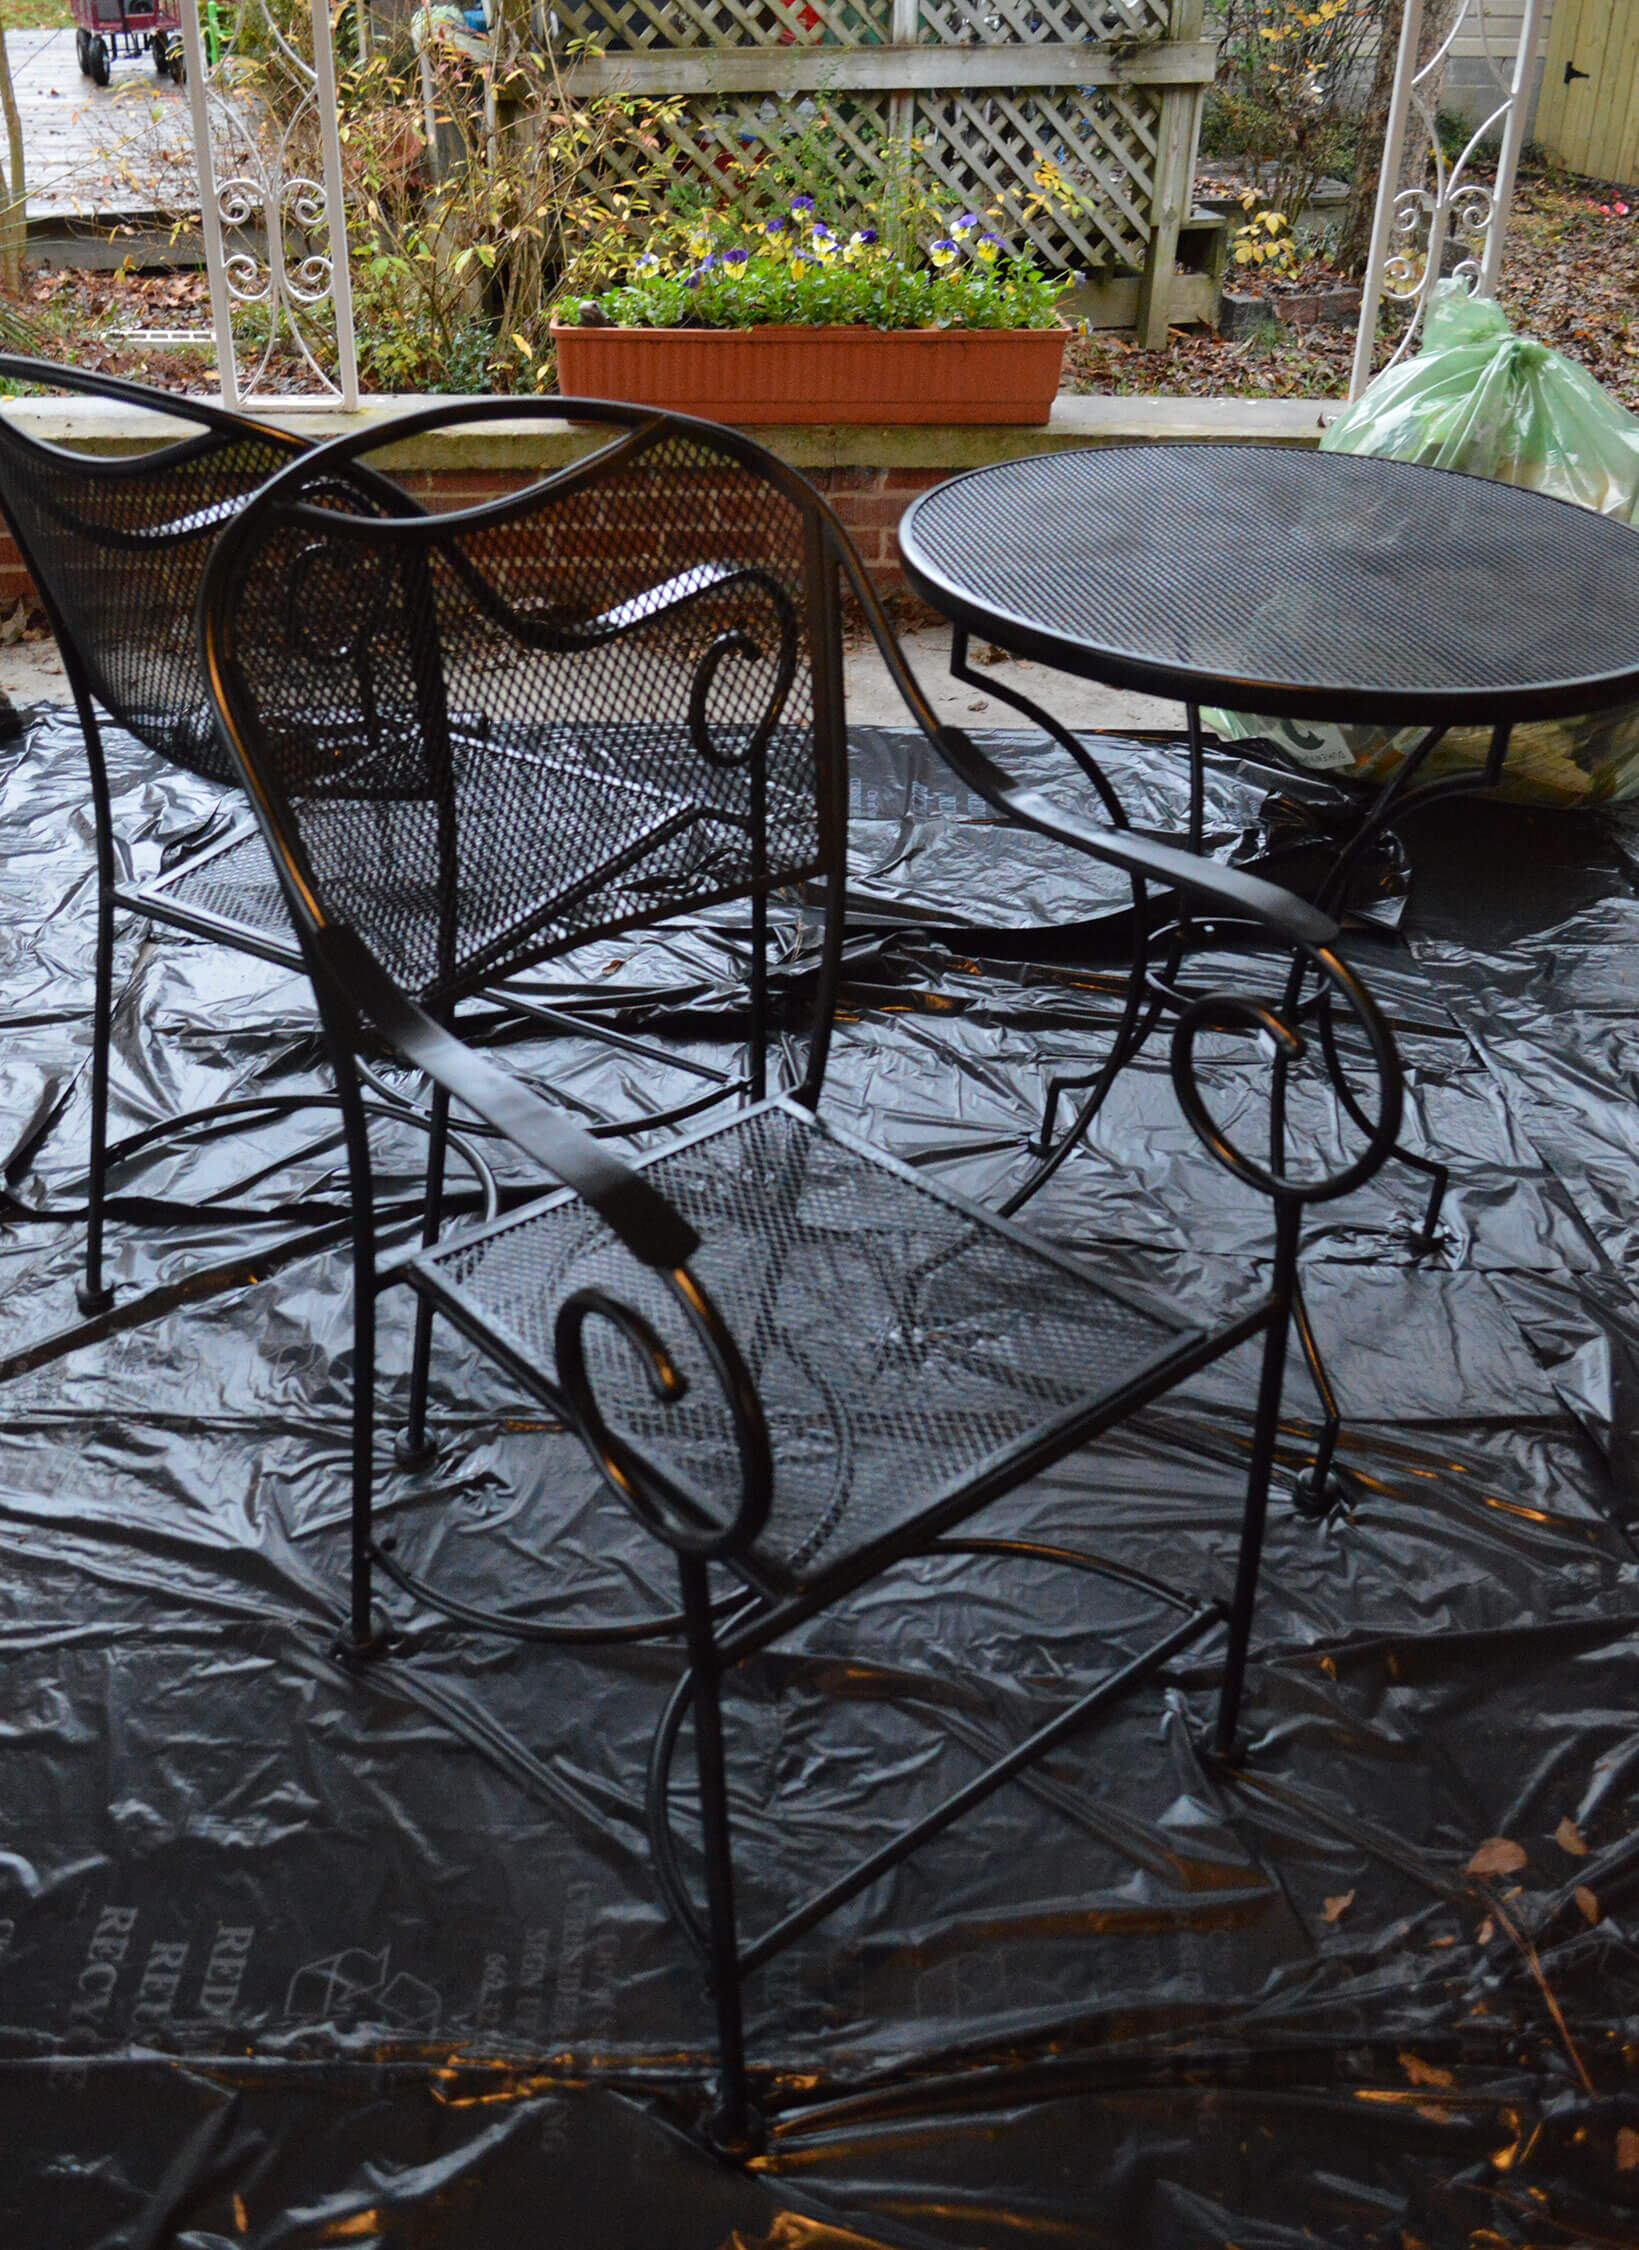
Usually I would spray paint on my lawn (be sure to spray paint in a well-ventilated area), so that the paint drift doesn’t land on anything important. On this occasion, it was about to rain, so I decided to do the painting under my carport. To avoid the drift from painting anything I was partial too, I moved everything from a 4-foot radius of the paint zone and covered the concrete with plastic bags. A drop cloth probably would work better since it is less likely to be slippery when you walk on it.
I recommend wearing a face mask to avoid inhaling the spray paint and wearing olds shoes/clothes that you won’t mind getting paint on. Walking on spray paint can make your shoes initially sticky and then slick as they get covered in dirt/leaves/etc that stick on the bottom.
Step 4: Spray paint
I used Rustoleum paint for outdoor use. Be sure you get a paint that is intended for the use and type of material that your furniture is made of – it will last longer.

Spray painting well takes some time and patience. You never want to put too much spray paint on one spot or it will begin to run, and you don’t want to use spray paint too close to the item you are painting. Spray the paint about 1 to 1.5 feet from the surface using even side to side motions. You’ll probably need to paint one coat, let it dry, and then come back with another coat.
In my case, since I was spray painting in very humid weather, I had to spray paint one coat, let it dry (which took overnight) and then apply another coat.
With your tables and chairs, I recommend that you paint the bottom first and then paint the top. I found that if you do the top first and then flip it upside down, you may have to repaint the top due to something sticking to it or scratching it when it was upside down.
Be sure to let the paint dry thoroughly before touching the surface.
That’s it! My parents were thrilled with the way the table and chairs turned out – they almost looked like a brand new patio set! I hope that the new paint will last them for years to come.